So, you finally got yourself an espresso machine—exciting, right? Staring at all these buttons, levers, and the mysterious steam wand, you might be wondering where to start. Not to worry—I’ve been there too. Beginners may find it challenging to learn how to use an espresso machine, but once they get the hang of it, it’s a lot of fun.
In this guide, I’ll walk you through everything—from setting up your machine to pulling your first perfect shot. Whether you’re craving a bold espresso, a creamy latte, or a frothy cappuccino, I’ve got you covered. So, grab your favorite coffee beans, and let’s turn that countertop gadget into your new favorite morning ritual!
Types of Espresso Machines

Not all espresso machines are created equal! While they all serve the same purpose—brewing rich, concentrated coffee—the way they operate can vary. Here are the most common types:
- Manual Espresso Machines – Old-school and hands-on. You control everything, from pressure to extraction time. Great for purists, but they take practice.
- Semi-Automatic Espresso Machines – A balance between control and convenience. You grind, tamp, and start the shot, but the machine handles the pressure. Ideal for beginners who want to learn.
- Fully Automatic Espresso Machines – Push a button, and the machine does the rest. These are great for those who want consistency without the learning curve.
- Super-Automatic Espresso Machines – These grind, tamp, brew, and even froth milk with zero effort from you. Perfect if you love espresso but don’t want to play barista.
Basic Components of an Espresso Machine
Every espresso machine, no matter how fancy or basic, has a few key parts that work together to pull that perfect shot. Here’s what you need to know:
- Portafilter – This is where your ground coffee goes. It locks into the machine and holds the coffee while water is forced through it.
- Group Head – The connection point between the portafilter and the machine. It delivers hot, pressurized water to extract espresso.
- Boiler – The heart of the machine. It heats water to the ideal brewing temperature and creates steam for frothing milk.
- Pump – The muscle behind espresso extraction. It forces water through the coffee grounds at high pressure (typically 9 bars).
- Pressure Gauge – Displays the pressure level during extraction. Keeping an eye on this helps ensure consistent shots.
- Water Reservoir – The built-in water tank. Some machines have direct water line connections, but most home models use refillable reservoirs.
- Steam Wand – Your milk-frothing tool. It uses steam pressure to create microfoam for lattes and cappuccinos.
- Shot Buttons – The controls for starting and stopping the espresso shot. Some machines allow customization for different shot sizes.
- Pressure & Temperature Dial – Helps monitor and adjust the brewing temperature and pressure for precision control.
- Drip Tray – Catches excess water and coffee drips. Keeping it clean prevents messes and keeps your machine running smoothly.
Essential Tools & Ingredients
Before you start brewing, you’ll need more than just an espresso machine. Having the right tools and ingredients makes all the difference in achieving a smooth, flavorful shot. Here’s what you’ll need:
Fresh Coffee Beans

Great espresso starts with great beans. Look for freshly roasted coffee (ideally within the last two weeks) and choose a roast labeled for espresso. Darker roasts are common, but medium roasts can also work depending on your taste.
Burr Grinder (Not Blade!)
A consistent grind is key to pulling a balanced shot. Burr grinders provide even, fine grounds, while blade grinders chop beans unevenly, leading to inconsistent extraction. If you want café-quality espresso, a burr grinder is a must.
Tamper
Once you’ve measured your coffee grounds, you’ll need to tamp (press them down) evenly in the portafilter. A good tamper ensures proper water flow and prevents weak, under-extracted espresso.
Scale & Timer
Precision matters! A digital scale helps measure the right amount of coffee (usually 16-18 grams for a double shot), while a timer lets you track extraction time (ideally 25-30 seconds). Many espresso machines have built-in timers, but a separate one works too.
Milk (For Lattes & Cappuccinos)
If you’re planning on making milk-based drinks, whole milk is the best choice for rich, creamy foam. However, oat milk, almond milk, and soy milk also work well if you prefer non-dairy options.
Optional Extras
Want to level up your espresso game? Consider adding:
- A milk frothing pitcher for better control when steaming milk
- A knock box to easily dispose of used coffee grounds
- A distribution tool to help even out your coffee grounds before tamping
How to Use an Espresso Machine for Beginners

Alright, let’s get brewing! Pulling a great shot of espresso takes a little practice, but don’t worry—I’ve got you. Follow these simple steps, and you’ll be sipping a smooth, delicious espresso in no time.
Step 1: Preheat Your Espresso Machine
Before doing anything, turn on your machine and let it warm up. This ensures that the water reaches the ideal temperature (between 195°F – 205°F) for proper extraction. Some machines take just a few minutes to heat up, while others may require 15-20 minutes.
To help with temperature stability, run a blank shot (without coffee) by letting hot water flow through the group head. This preheats the portafilter and helps maintain consistency when brewing.
Step 2: Grind Your Coffee Beans
Grinding fresh coffee beans right before brewing is essential for the best flavor. Use a burr grinder (not a blade grinder) to ensure an even, fine grind—about the texture of table salt. The amount of coffee, or dose, depends on the shot size:
- Single shot: Use 7-9 grams of coffee.
- Double shot: Use 16-18 grams of coffee.
When espresso extracts too fast and tastes weak, the grind is too coarse. Make it finer. If it’s coming out too slow and tastes bitter, the grind is too fine—make it coarser.
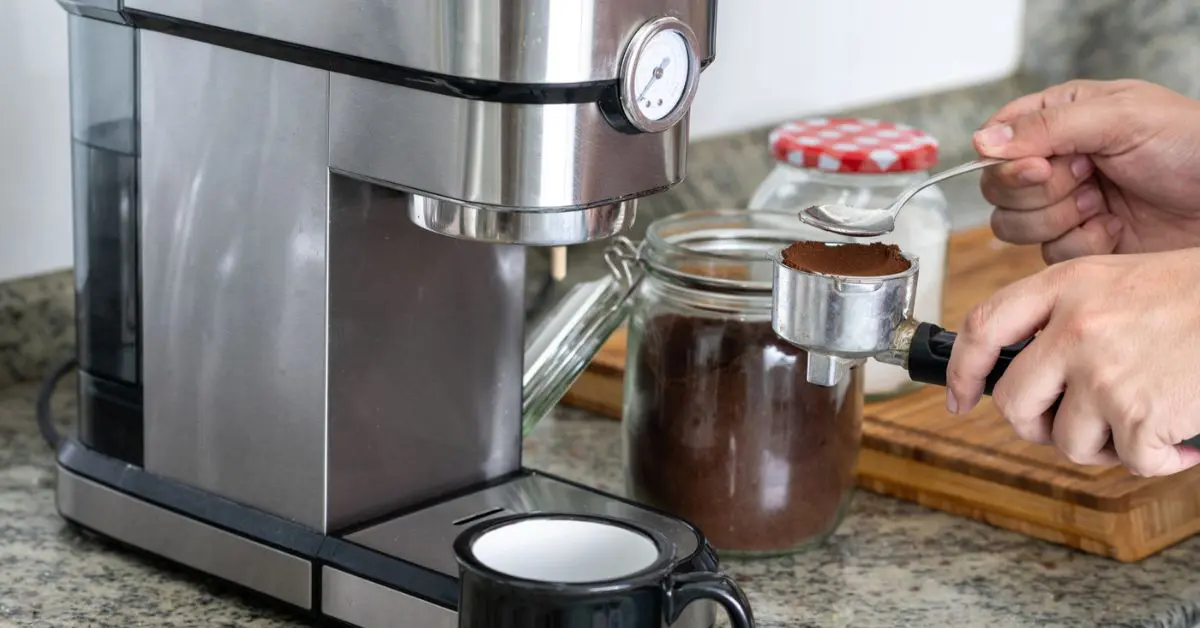
Step 3: Dose and Distribute the Grounds
After grinding, place the coffee grounds into the portafilter basket. Use a spoon or a dosing ring to avoid spills and ensure you’re using the correct amount of coffee. Next, distribute the grounds evenly in the basket. You can:
- Use your finger to level the grounds.
- Tap the portafilter gently to settle the grounds.
- Use a distribution tool (if you have one) to ensure an even surface.
Even distribution is key to preventing channeling, where water finds weak spots and creates an uneven extraction.
Step 4: Tamp Firmly and Evenly
Tamping compresses the coffee grounds into a smooth, even puck, ensuring that water flows through at the right pressure. Here’s how to do it correctly:
- Hold the tamper with a straight wrist and apply about 30 pounds of pressure.
- Press down firmly and evenly until the grounds feel compact.
- Give it a slight twist at the end to polish the surface.
Avoid tilting the tamper—an uneven tamp can cause water to flow through one side faster, leading to an unbalanced shot.
Step 5: Lock the Portafilter and Start the Shot
Now, insert the portafilter into the group head and lock it into place. Make sure it’s secured tightly. Place your cup underneath the spouts, then start the shot.
Watch carefully as the espresso flows out. A perfect shot should start slowly as a few dark drips, then develop into a steady, golden-brown stream.
Step 6: Watch the Brew Time
A well-balanced double shot should take about 25-30 seconds to brew from the moment you start the extraction.
- If your shot pulls too quickly (under 20 seconds), the coffee is under-extracted, leading to a sour taste. Try a finer grind or a firmer tamp.
- If your shot takes too long (over 35 seconds), it’s over-extracted and may taste bitter. Try a coarser grind or a lighter tamp.
If needed, tweak your grind size and tamping pressure until you find the perfect balance.
Step 7: Check for Crema
Crema is the golden, velvety layer of foam on top of your espresso, formed from the natural oils in the coffee. A rich, thick crema is a sign of a well-extracted shot.
- Good crema: Golden brown with a smooth, velvety texture.
- No crema: Your coffee might be stale, or the shot is under-extracted.
- Too much crema: Your grind may be too fine, or the coffee is over-extracted.
Crema adds flavor and texture, so don’t skip this step—it’s a great visual cue for espresso quality.
Step 8: Taste and Adjust
The real test of a good espresso is how it tastes! Take a sip and assess:
- If it’s bitter: The shot is over-extracted. Try a coarser grind or reduce the brewing time.
- If it’s sour: The shot is under-extracted. Use a finer grind and check your tamping.
- If it’s weak or watery: Adjust the grind size and ensure the coffee dose is correct.
A balanced espresso should have a rich, bold taste with a slight natural sweetness—no overpowering bitterness or sourness.
Cleaning & Maintenance Tips for Espresso Machines

Keeping your espresso machine clean is essential for great-tasting coffee and ensuring your machine lasts for years. A well-maintained machine prevents bitter flavors, clogging, and breakdowns. Here’s a simple guide to help you keep your espresso machine in top shape.
Daily Cleaning Routine
- Flush the Group Head – Run hot water through the group head after each use to remove leftover coffee grounds and oils.
- Wipe the Portafilter and Basket – Knock out used coffee grounds, rinse with hot water, and wipe dry. Avoid soap, as it can leave behind residue.
- Purge the Steam Wand – After steaming milk, wipe the wand with a damp cloth and purge steam to clear out any milk residue.
- Empty the Drip Tray & Water Reservoir – Remove stagnant water daily to prevent mold and bacteria buildup.
Weekly Deep Cleaning
- Backflushing (For Machines with a 3-Way Valve)
- Insert a blind basket (solid filter) into the portafilter.
- Add a small amount of espresso machine cleaner or detergent.
- Lock the portafilter in place and start the brew cycle for 5 seconds.
- Stop, wait 10 seconds, then repeat 4-5 times.
- Rinse thoroughly by running clean water through the machine.
- Clean the Shower Screen & Gasket – Use a soft brush to scrub away trapped coffee grounds. If removable, take out the shower screen for deeper cleaning.
Monthly Maintenance
- Descale the Machine
- Mix equal parts white vinegar and water or use a commercial descaling solution.
- Fill the water reservoir and run a brew cycle without coffee.
- Let the solution sit for 15-20 minutes, then rinse thoroughly with fresh water.
- Inspect Seals & Gaskets – Check for wear and replace if cracked or hardened to prevent leaks.
Storage Tips
- If you’re not using your espresso machine for a while, empty the water reservoir and wipe it dry to prevent mold growth.
- Store your portafilter outside the machine to allow air circulation and prevent moisture buildup.
Common Beginner Mistakes to Avoid
Starting with an espresso machine can be a bit tricky, but it’s a learning process. We’ve all made these mistakes, so don’t worry! Let’s dive into the most common ones and how you can avoid them to make better espresso every time.
Using Pre-Ground Coffee
Using pre-ground coffee sacrifices freshness and flavor. Ground coffee loses its aroma quickly. Always grind your coffee just before brewing to preserve its flavor. Invest in a burr grinder for a consistent grind and enjoy the fresh taste of your espresso every time.
Incorrect Grind Size
Grind size affects your espresso’s flavor. A coarse grind leads to weak, sour coffee, while a fine grind can result in bitterness. For espresso, aim for a fine grind. Adjust your grind based on the shot’s speed. Burr grinders help achieve consistent results.
Not Tamping Evenly
Uneven tamping causes uneven extraction. This leads to poor flavor. Apply about 30 pounds of pressure when tamping, and make sure the surface is level. Consistent tamping is crucial for a balanced shot and better-tasting espresso every time.
Poor Milk Frothing Technique
Improper frothing results in poor texture. Either the milk gets too hot or doesn’t froth enough. Keep the steam wand below the milk’s surface and angle it slightly to create a whirlpool. Stop steaming once the milk reaches 130-150°F for perfect microfoam.
Skipping Machine Maintenance
Neglecting machine maintenance leads to clogs and poor performance. Clean the group head, portafilter, and steam wand after each use. Perform a backflush and descale your machine weekly. Regular cleaning keeps your espresso tasting fresh and ensures your machine works properly.
If you still haven’t purchased your first espresso machine check out our comprehensive review guide on Top Espresso Machines For Beginners for making the right purchase.
Conclusion
Using an espresso machine for beginners may seem challenging at first, but with practice, you’ll get the hang of it. Remember, consistency is key—whether it’s grinding, tamping, or frothing. By avoiding common mistakes and maintaining your machine, you’ll be brewing perfect espresso in no time. Enjoy the journey, and soon, you’ll feel like a pro with every cup!